To buy or not to buy, that’s the Question coming up to the mind along with every new interesting product that appears on the market…
Long story short
The answer is quite simple. For those, who are eager to hear my opinion, after spending 5 nights out with the camera I can give the answer. For me, definitively YES! I do not rate the products that I review on any scale, but if I would, I’d give 97% (that’s 97 points out of 100). Quite strange, based on the fact that I actually only bash things and criticize every single thing I see or get into my hands ![]()
Short story long
Why did I purchase it?
when I already have (had) Moravian G3-11000 a full-frame (36x24mm) monochromatic „beast“ that performs so well? Because I wanted a newer technology (Sony IMX094 CMOS chip) and even could afford to have an OSC (color) chip if and only if the pixels are small so as I do not have to sacrifice the resolution (in sense of detail – image scale) and final pixel count – width and height after a 50% scale down. And I wanted a camera with really fast download time of single raw frames. And ![]() since I mainly shoot LRGB/RGB (color) images of nebulae and dust (faint DSO objects) in real colors then a color camera might do just well. Last, but not least, it could also be a nice device for photography of comets as they typically move very fast and it’s a hassle to switch the color filters (Red, Green, Blue) all over again with a monochromatic camera. And, I anyway wanted yet another 36x24mm camera for a second setup.
since I mainly shoot LRGB/RGB (color) images of nebulae and dust (faint DSO objects) in real colors then a color camera might do just well. Last, but not least, it could also be a nice device for photography of comets as they typically move very fast and it’s a hassle to switch the color filters (Red, Green, Blue) all over again with a monochromatic camera. And, I anyway wanted yet another 36x24mm camera for a second setup.
Unpacking the package, what’s in the box
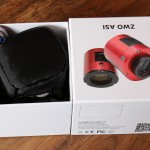
As I was probably the first customer of their final product (no beta) I was missing the CD with drivers (but who actually has a CD drive these days – a flash USB stick would be better – as e.g. Moravian or ASA provides) and printed short manual – quick start guide. But all this can be easily found and downloaded from the website of ZWO.
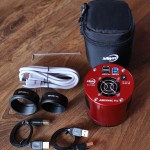
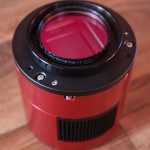
Then there was the camera body, nice, round and in typical red color – looks beautiful. The camera was in a soft protective bag. Then there was a hex key wrench for the tilt adapter, USB 3.0 cable, some USB 2.0 short cables for the USB hub that’s on the back side of the camera and two M54x0.75 to something (M48) adapters of various length and a threaded cap on the camera protecting the chip, actually the optical window.
Installing drivers, checking the camera
This task was quite straightforward as there’s only one main driver for all ASI cameras and hence you need to download the ASI cameras driver setup and ASCOM driver to control the camera from a 3rd party control software.
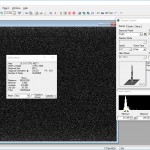
When I plugged the USB (and later the extra power cable – taken from my G3-11000) I managed to connect via ASCOM driver to the camera and took some initial frames – biases and dark to see how the camera operates. Everything was just fine, clean bias frames and uncooled 60 seconds dark did not show any amp-glow – was simply looking good. I was shocked by the pixel resolution though!
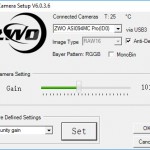
The camera, as every CMOS camera, offers variable gain settings. I am happy to see that there’s no offset setting available for the user – it just make things too complicated for a newcomer. And there’s only one reasonable offset settings – to not clip the dark part of the data (left part of the histogram). I assume that I will operate the camera with two main presets. For typical DSO imaging I plan to use the unity gain settings and nothing else. And for imaging of comets where I need shorter sub-exposures I will use the high gain settings (lowest readout noise settings). I do not plan to do any narrow band imaging with this camera even though it might be possible with either Ha filter or OIII filter or some CLS/ultra high contrast filter. For narrow band imaging I plan to use a different CCD or CMOS camera. ![]()
Before the first light
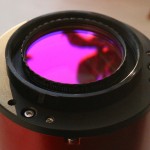
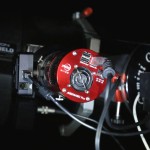
One needs to know the back focal distance of the camera. That is, the distance from the chip surface to the front part of the camera body with the M54x0.75 threads. It is 17.5mm – typical value for many (but far not all) ZWO ASI cooled cameras. First thing needed is the adapter to connect the camera to my imaging system, that is, a ASA 3″ Wynne corrector and ASA’s Off-Axis-Guider. For this, I had to design my own set of adapters that I have custom made by a friend of mine (precise work for 10% of the price that the big companies ask for). I have designed a copy of the ASA Wynne corrector to M54 threads adapter and designed a „pech“-threaded spacer (extension tube) and finally a „pech“-thread to M54x0.75 male threads to fit the camera. The camera has M54x0.75 female threads for attachment to the telescope (corrector lens). In my design I settled on the „pech“ threads as M60x0.75. The final part that threads to the camera contains one extra M48x0.75 inner threads so as I can screw-in a typcial 2″ filter right in front of the original AR-only coated optical window – this way I did not have to modify the camera – open and replace the original glass with a UV/IR one. In my case, I put the Baader UV/IR cut 2″ filter in there ![]() so everything was perfect and ready for astrophotography.
so everything was perfect and ready for astrophotography.
First light
Unfortunately, on my first night out I realized that I missed the focus position, my spacer was too long. After having this fixed a yet another clear night came! and voila! I reached the focus. Moreover, I was impressed that my telescope seems to be collimated (still) well enough and that the camera doesn’t seem to show any tilt of the large CMOS chip as I managed to get reasonably sharp stars within almost full field of view of my setup! Great. That’s why I actually decided to shoot open clusters, to give it a try to shoot an image full of stars (instead of my typical nebulae work).
In the couple of nights I have been using the camera I was very happy with the simple operation and no need to change R, G, B filters and whole night calculate how many subs in which filter color I need to shoot more and being afraid that if clouds come or something happens to go home without e.g. blue set of data.
No single frame lost, no issues during imaging and no dewing of the chip! I always work in the fields where an insanely high relative humidity occurs every single night – my RH meter shows typically 90 to 93% and everything is covered with water drops. This was one of my biggest fear apart from the tilt of chip that I observed in every camera I had in the past and always had to point the manufacturer to pay attention to this.
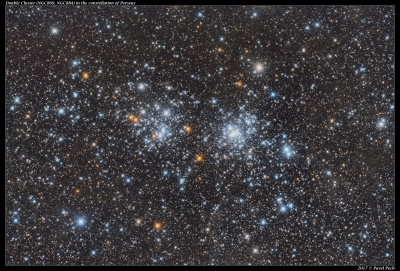
So far, I managed to get data for IC1848 – Soul Nebula, ASASSN Comet next to a DSO object, NGC884 and NGC869 Clusters and IC417 – capture of data still in progress. As I am totally busy, I managed to post process only the double cluster image. It’s just a collection of some 45 subs of 5 minute duration. If the viewer’s LCD screen is calibrated well enough and one adjusts the brightness a bit there could be spot some faint dust (nebulae) in the image – this is very rare, I have not found any (many – apart from one H-a enhanced) images of such deep capture of the star background.
Specification and technical data
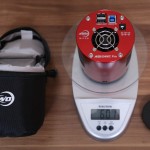
Measured only the weight of the camera without the cap – 601 grams. For full list please see the maker’s website.
Gallery
Astrophotographs taken with the camera: Pavel Pech, ZWO ASI094MC Pro
Summary
it’s been a long time since I was so excited about a new gear!
Cons
- it could have had the UV/IR cut filter installed by default
- the cooling delta -30° to -35° Celsius may seem a bit low
- a single raw FITs frame has huge 69 Megabytes!
If there’s UV-IR cut filter installed instead of the AR-only glass on the protection window (as this is a color camera and therefore everybody will need it for astrophotography) then I’d have to give the final rating 100% ![]() The lower delta cooling is not a big deal as it might seem. And, because of the large files you may need to update your computer or get extra HDD space for the dark frame library (BTW debayered single color image has over 200 MB). A minor „con“ is that’s an OSC camera, but I think it’s the best 36x24mm camera for astrophotography on the market today. No reason to get any modified version of DSLR or mirror-less DSLR (I love those!) for astrophotography and fiddle with custom made cooling. This ZWO camera has it all (cooling, custom filter and direct ASCOM driver).
The lower delta cooling is not a big deal as it might seem. And, because of the large files you may need to update your computer or get extra HDD space for the dark frame library (BTW debayered single color image has over 200 MB). A minor „con“ is that’s an OSC camera, but I think it’s the best 36x24mm camera for astrophotography on the market today. No reason to get any modified version of DSLR or mirror-less DSLR (I love those!) for astrophotography and fiddle with custom made cooling. This ZWO camera has it all (cooling, custom filter and direct ASCOM driver).
There could also be the 12V car-plug power cable (of a length of 3 meters) included in the box. It’s needed for the TEC cooler and suprisingly it’s not part of the package (as historically, the ASI cameras were mainly used for solar system imaging or autoguiding where only an USB cable is needed, not meant as hi-tech cooled DSO cameras like nowadays).
Pros
- full-frame (36x24mm) camera with 13 stops in dynamic range
- 14-bit ADC, 52K full well capacity
- insane 36 megapixels (7376 x 4928 pixels)
- it NEVER dewed up (tested in a very humid environment, RH 93%)
- it has a tilt adapter
- ultra low readout noise (exact value is irrelevant for a color camera)
- insane FAST frame download time (about 1 second via full ASCOM protocol)
- no issues with amp-glow anywhere
- it’s nice fit&finish, red circular body (no obstruction, no interference in OAG)
- contains USB2.0 hub to save one cable from PC to the guide camera
- it’s lightweight and compact size
And I have never got any corrupted frame downloaded from the camera probably due to the integrated DDR3 image buffer to readout the data from the chip as soon as possible and then safely transfer the image to the computer.
Even if I downsize the image to 50% scale I end up with 9 megapixel resolution! The heating of the optical window works just well and that’s a great news. The chip in my camera was perfectly square/perpendicular to the front of the camera so I did not have to mess with the tilt adapter. Exact readout noise value is really not important at all for a color camera as long as this value is low, which is, in this case (about 2.1e- according to the specifications). Anything < 5e- is just great for RGB imaging. The fast readout of the whole 36Mpix image saves me a lot of time when shooting flat field calibration frames in the morning after an imaging session compared to a KAI-11002 CCD camera which required more than 30 minutes more for 3 sets of flat field frames. Thanks to the round body it doesn’t interfere with my guide camera in the off-axis-guider.
Only a camera with latest full-frame BSI CMOS chip, Sony IMX251 having 42 megapixels (remember it’s a BSI and therefore the small pixels do not have the typical low sensitivity handicap) or some future big mono camera will outperform the ASI094MC Pro.
Links
UPDATE (spring 2018):
In order to post-process the RAW images obtained from this great camera, I had to update my main computer for astroprocessing. So far, I’ve been able to get around with a laptop (processing data from 11Mpix camera). But with these beautiful 36Mpix, I need a new workstation. Therefore, I purchased the best available PC at the moment (so that the next best CPU or other component costs twice if it is just a bit better). One may count with some 2.500,- EUR for that. See a PixInsight benchmark of my machine: Intel Core i7-7820X (8-Core, run @ 3.6GHz), HyperX 32GB KIT 3600MHz DDR4 CL17 Predator (4x8GB quad-channel, run @ 3200MHz), NVMe Samsung 960 PRO. ![]()

Considering the IMX094 sensor is almost 5 years old – is Sony offering the IMX251 for 3rd party manufacturers? As far as I know only their A7RII/III have this sensor and not even Nikon ever used it. Or, perhaps IMX235 considering its low-light performance could be the best for astrophotography…
Yes, IMX094 is 5 years old, but my former KAI-11002ME chip from Kodak/TSI/OnSemi/whoevertoday is a 20 or maybe even 30 years old technology and still usable in today’s World (best for LRGB imaging).
 we are uncomparable tiny market so no interest for them… I am personally hoping for a mono IMX294
I get your point, but it’s hard to get these chips for 3rd party manufacturers, due to the silly dealing policy Sony has (guessing) it’s hard for an EU maker to get whatever we may want to – the official dealers in the path just may not be interested in selling pieces of these chips to a small (tiny market) company.
Nikon uses the 42Mpix BSI chip in their newest camera I think D850 or something like that.
There are many chips that could be best for astrophotography, but Sony (and others) do not produce monochromatic version of „nice“, low-light sensitive CMOS chips
Nice review, what is the bayer matrix pattern, BGGR, GBRB, etc.? I’m having trouble matching the images with the debayer process.
Thanks
Hi Chuck, I have just used the most common pattern, i.e. RGGB, that’s the first and default option in MaxIm DL and I got it right on 1st attempt so I never looked deeply into it
Hi Pavel,
do you know why the ZWO stoped produce this camera ?
Are there any similar product with full frame color chip ?
Thanks
Nevíte proč ZWO zastavilo produkci této kamery ?
Existuje nějaký podobný produkt s full frame color chipem ?
Díky
Zdenek Vojc
Hi – nice review. I just picked up a 094 and am trying to learn more about it.
Why do we need the IR/UV cut filter?
I am using this on a C11 RASA and have the Celestron RASA LP filter installed.
Do I still need a UV cut? (what will that do)?
I tested the camera one night so far and I couldn’t pick up any nebulousity.
It was quite disapointing as I’m usually doing narrow band and have excellent results.
My normal camera is a 1600MM pro.
thanks for your review and any help you can share? I wanted to see your gallery of 094 images but when I went to your site it was in another language and had a mix of cameras used and I never did find one with the 094.
blessings-
Ron