Ultralehký, mobilní, stabilizovaný 12V astro zdroj

LTM4613Představa zněla jasně – škálovatelný (s rozumnou, volitelnou kapacitou), malý, lehký, přenosný, stabilizovaný 12V zdroj na astro-krámy. No a jak víme, buď má zdroj dostatečnou kapacitu a je těžký jako vepř, nebo má nedostatečnou kapacitu, ale zas je lehký. Jako nejlepší řešení mě vyšlo jej založit na Li-Po battery packu, který splňuje alespoň tolik, že je vzhledem ke své kapacitě poměrně lehký. Nevýhodou je ovšem pořizovací cena, ale budiž, něco se prostě obětovat nakonec musí…

Vzhledem k dalšímu požadavku, aby bylo na výstupu stále 12V a zároveň nedocházelo ke ztrátě energie (kapacity) tím, že použiji nekvalitní, čínský stabilizátor či step down modul, jsem musel místo 4S battery packu (bych se pohyboval v rozmezí 12-16V dle nabití) jít do 5S, tj. 5ti LiPo baterii v sérii. Tudíž se pohybuji o pár gramů hmotnosti na jeden battery pack výše, ale zase se lépe shání kvalitní (s vysokou účinností přes 92% po 95% podle zatížení) stabilizovaný DC to DC step down modul :) a v rozsahu od 15ti (vybito) do 21V (nabito) na jeden battery pack, vážící 666 gramů a mající kapacitu 5Ah.

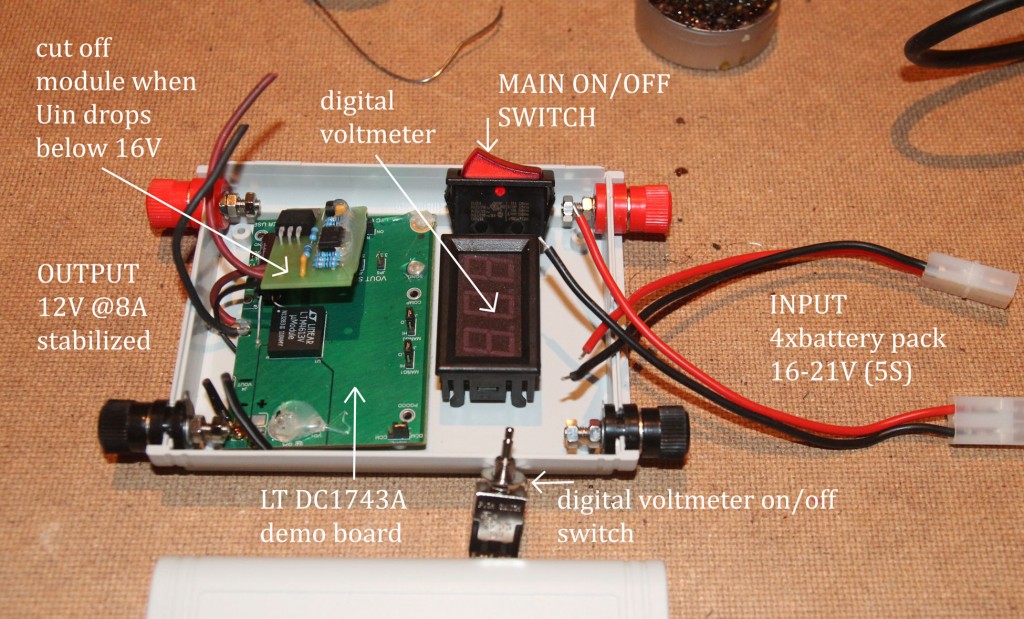
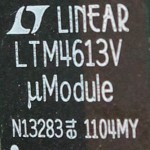
Jako ideální step down modul se ukázal býti LTM4613 od Linear Technology, který lze rovnou zakoupit i s osazenou deskou – demo board za příznivých 65 babek (USD), kde si volbu výstupního napětí zvolíme přes jumper. Na vstup jsem přivedl výstup z odpojovače zhotoveného Milošem Zajícem, který mám nastaven na cca 15V, takže když mi dojde šťáva prostě se to celý samo vypne, aniž bych vycucnul poslední zbytky energie z baterry packu/ů, čímž je chráním před pod-vybitím.

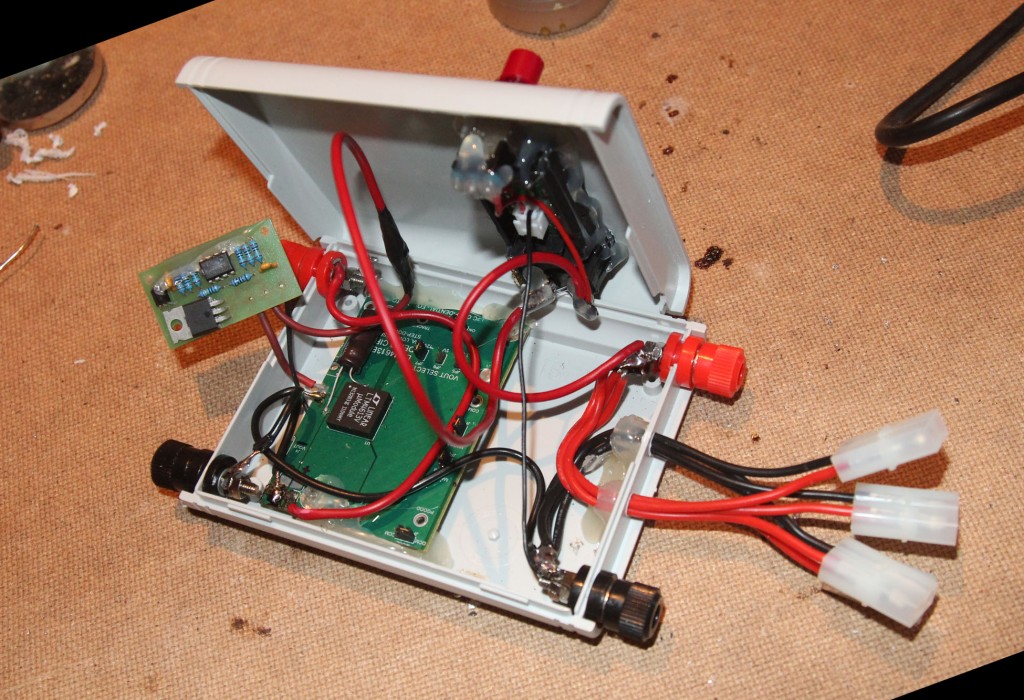
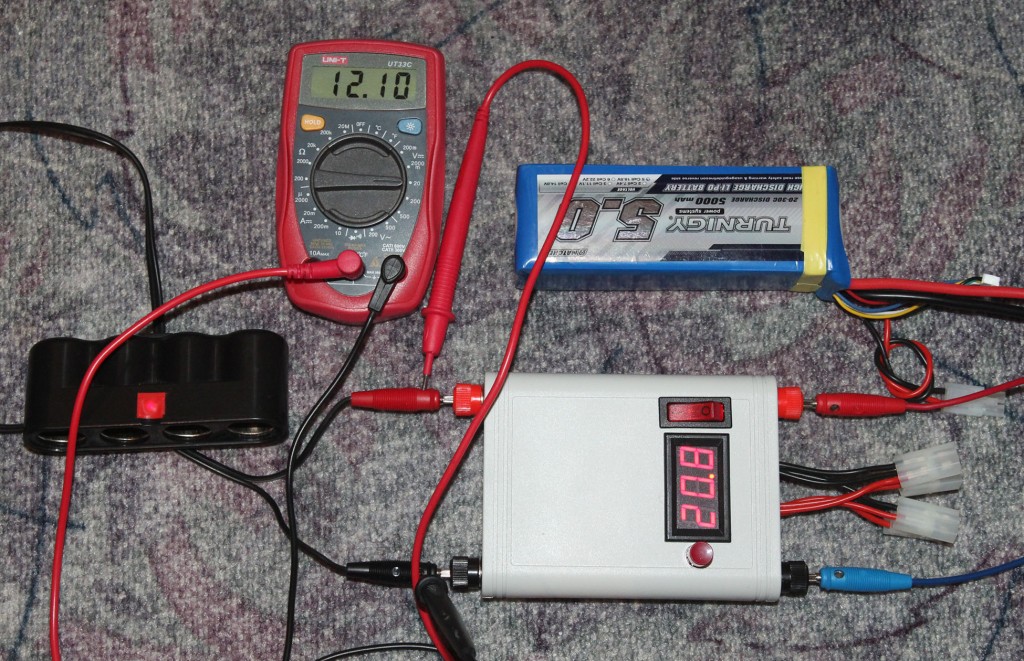
Následující obrázky jsou „self explanatory“, samo-vypovídající.

ultralightmobileps12v

Ultra-light (mobile), scaleable, stabilized 12V power supply

ultralightzdroj12v-kompletace

ultralightzdroj12v-finale

Ultra-light (mobile), scaleable, stabilized 12V power supply

Parametry

  • vstup 15-30V (pro můj případ 15-21V) a to 4x battery pack nebo 1x banánek konektor
  • kapacita zdroje podle počtu zapojených battery packů od 5Ah přes 10Ah, 15Ah až po 20Ah a 0.7kg resp. 1.4kg, 2.1kg až po 2.8kg váhy
  • výstup 12V stabilizovaných, 8Amp max

:) cílem je vylézt na vrchol sopky někde v divočině a tam fotit noční oblohu přes ultra-mobilní astrofoto sestavu. Prozatím jsem tento svůj sen realizoval jen částečně a snad jen jednou (Mauna Kea) ale neměl jsem štěstí na jasnou oblohu… tak snad někdy příště!

Odkazy
LTM4613EV Demo Board: Ultralow EMI, 36V, 8A Step-down uModule Regulator
Odpojovač akumulátoru při podpětí programovatelný
Turnigy 5000mAh 5S 20C Lipo Pack
Intelligent Car DIY 3-Digit Display Digital Voltmeter Module
iCharger 106B-plus 250W 6s Balance/Charger

Rubriky: Technika, recenze, Výjezdy (jednonoční) | Napsat komentář

Zdroj 12V z autozásuvek na mobilní astro s dobíjením

Přesněji řečeno rozvaděč 12V autozásuvek pro použití „na poli“ při focení astrosestavou náročnou na spotřebu proudu s dobíjením mimo dosahu 220V tak, aby nedošlo k poklesu napětí na astro-autobaterii a tímpádem nedošlo k např. resetu montáže či jiného nastavení…

Modelová situace – autobaterie v autě je sice pěkná, ale její kapacita je příšerně malá (stačí zapomenout rozsvícená světla na pár hodin a už nenastartujete) nehledě na přechodový odpor v jedné jediné volné autozásuvce a na fakt, že člověk obvykle potřebuje odebírat několik ampér v kuse. Takže na napájení astrosestavy je nutné koupit nějakou dedikovanou trakční autobaterii, čím vyšší kapacity tím lépe (používám aktuálně 90Ah trakční Vartu (a záložní 75Ah), která má ještě trochu normální rozměry a hmotnost, že se dá unést, dříve jsem měl netrakční 95Ah a po 4 letech měla kapacitu 48Ah). Dále je dobré vědět, kolik ampér ten který spotřebič vyžaduje, u mě to je např. 5A pro hlavní CCD kameru, 2A pro montáž, 2A pro notebook, no a k tomu několik dalších drobností (chlazení, vyhřívání, …, další kameru, další notebook). Mám-li celkový požadavek na odebíraný proud 10A, tak teoreticky mi vystačí 95Ah autobaterie na 9 hodin, prakticky na cca polovinu, podle stáří a hlavně v závislosti na okolní teplotě (mnohdy fotíme i při -15 stupních Celsia a potřebujeme celou noc, třeba 8 hodin). Tudíž je zřejmé, že bude třeba během noci trochu dobíjet.

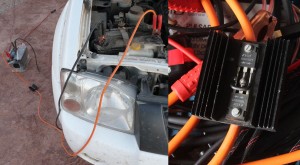
Klíčovým prvkem je spojení autobaterie v autě s astro-autobaterii vně auta, ze které vedou kabely k vlastnímu rozvaděči 12V autozásuvek a ke spotřebičům. No a zde právě není možné použít běžné startovací kabely. Je třeba si vyrobit vlastní a to jednak z maximálně tlustého vodiče a za druhé na (+) pól přidat diody usměrňující tok proudu jedním směrem a to jest z autobaterie v autě ven nikoli opačně z astro-autobaterie do autobaterie v autě. Tím by totiž došlo během pokusu o nastartování vozidla k poklesu napětí na astro-autobaterii (při startu se odebírá šíleně veliký proud – řádově mnohonásobný, byť jen na kratičkou chvilku) a k resetu či poruše nastavení astrovybavení. Diody tomuto zamezí a tak můžeme vesele startovat během noci několikrát a to úplně bez obav. Navíc, přes zimu obzvláště, je nutné si v autě kolikrát zatopit, aby člověk noc přežil (být někde 10 hodin v -15ti je docela náročné, zvláště mezi pracovními dny), takže spojíme příjemné s užitečným.

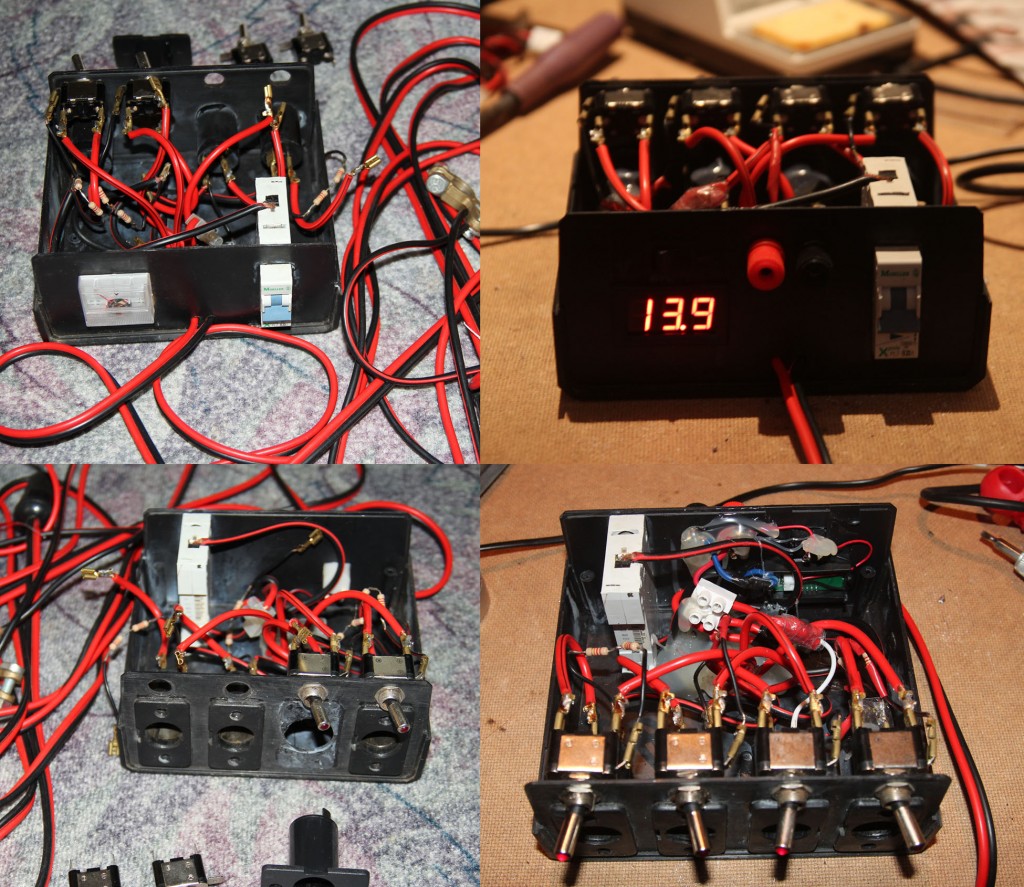
Pro vlastní rozvaděč platí, že je opět vhodné použít co nejsilnější vodiče s co nejnižším vlastním odporem. Když jsem před 5-6ti lety začínal, udělal jsem si první rozvaděč na pouhé 4 zásuvky řka, že potřebuji napájet montáž, kameru, počítač a ještě něco (vyhřívání objektivu). Dnes používám stále ten stejný rozvaděč první generace jen upraven o další rozvody, aktuálně potřebuji napájet montáž, hlavní CCD kameru, chlazení dalekohledu, fokusér, vyhřívání dalekohledu, počítač (ten napájí pointační CCD kameru a další z USB portu), EL-panel, … .

Aktuální rozvaděč má už digitální voltmetr na tlačítko a banánek-konektory / zdířky pro rozšíření možností napájení.
zdroj12v-drive-nyni

vlevo - dříve, vpravo - nynější podoba

Takovýto jednoduchý rozvaděč si dokáže postavit každý, kdo umí „dát“ plus na plus a mínus na mínus :)

zdroj12v-autokabelynabijeci

zapojení astro-autobaterie a autobaterie v autě
setupinaction

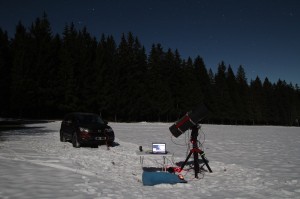
astrofoto sestava v akci

Na závěr musím poděkovat MMysovi (Martinu Myslivcovi) za volbu diod a zhotovení startovacích kabelů před expedicí Chile 2010.

Shrnutí

  • astro-autobaterii zvolit trakční a s co nejvyšší kapacitou (Ah) ale tak, aby ji člověk unesl
  • udělat si pořádný, masivní startovací kabely s diodama a velkýma svorkama
  • udělat si rozvaděč na těch 12V autozásuvkového konektoru (nebo alternativně kombinaci banánky na kabel (černá, červená) a zdířky do panelu, tj. dva póly pro každý spotřebič)
  • naddimenzovat rozvaděč, tj. 8 přípojek se mi jeví jako optimální hodnota
  • nebýt líný a kromě centrálního vypínače udělat i on-off tlačítko/vypínač pro každou přípojku/zásuvku
  • dbát na tloušťku vodiče, kterým přivedu napájení z astro-autobaterie do svého rozvaděče, používám délku tak 5-6 metrů a tloušťku hooodně velikou, uvnitř vlastního rozvaděče pak o něco menší, aby s tím šlo pracovat
  • připojení na astro-autobaterii buď krokosvorkami nebo přes očka
  • kvalitní autozásuvkový konektor se špatně hledá, ideální je tento, případně obrázek
  • nikde není žádný DC-AC měnič!!! na notebook a jiné příslušenství existuji DC-DC měniče z 12ti V na 15-21V dle volby, viz „Další odkazy“ níže. Je vhodné mít baterii v notebooku z domova plně nabitou! Pokud notebook „prská“, že nemá originální napájecí zdroj (typicky Dell, já tedy používám nejčastěji Toshibu a Lenovo), mělo by být vše i přes to OK, jen nebude baterii dobíjet, což ale ničemu nevadí
  • řízení dražších montáží (Losmandy Gemini, GTD Pulsar apod.) má obvykle „rádo“ vyšší napětí než 12V což se řeší podobným (k notebookům) DC-DC měničem s tím, že koncovku si napájíme dle typu řízení montáže a nastavíme vhodné napětí (používal jsem 16V pro Losmandy a teď pro Pulsar mám nastaveno 18V), např. Ansmann DCPS 2460 Univesal Power Supply DC/DC
  • barevně či jinak označit si jednotlivé kabely od spotřebičů a USB kabely, osobně používám elektroizolační lepenku různých barev a vzorů (červená – hlavní CCD kamera jak napájení, tak USB kabel, černa pointační, zelená vyhřívání atd.)
  • přelepit všechny možné diody, které obvykle svítí velmi jasně (až oslňují) tak, aby v noci opravdu tolik nerušily, za tmavé noci je jas opravdu přílišný!
  • jako 100% mobilní fotič noční oblohy ráno uklízím kabely na jednu hromadu (na karimatku) a pak celou podložku dám spolujezdci k nohám a než dojedu domů mám kabely vysušené a můžu je suché uklidit

Další odkazy
Trakční baterie VARTA Professional Dual Purpose (Deep cycle) 90Ah, 12V, LFD90
120W Compact Notebook Power Adapter PW-3120
Intelligent Car DIY 3-Digit Display Digital Voltmeter Module
Rubriky: Technika, recenze, Výjezdy (jednonoční) | Napsat komentář

Flat Calibration Example (Kodak CCD)

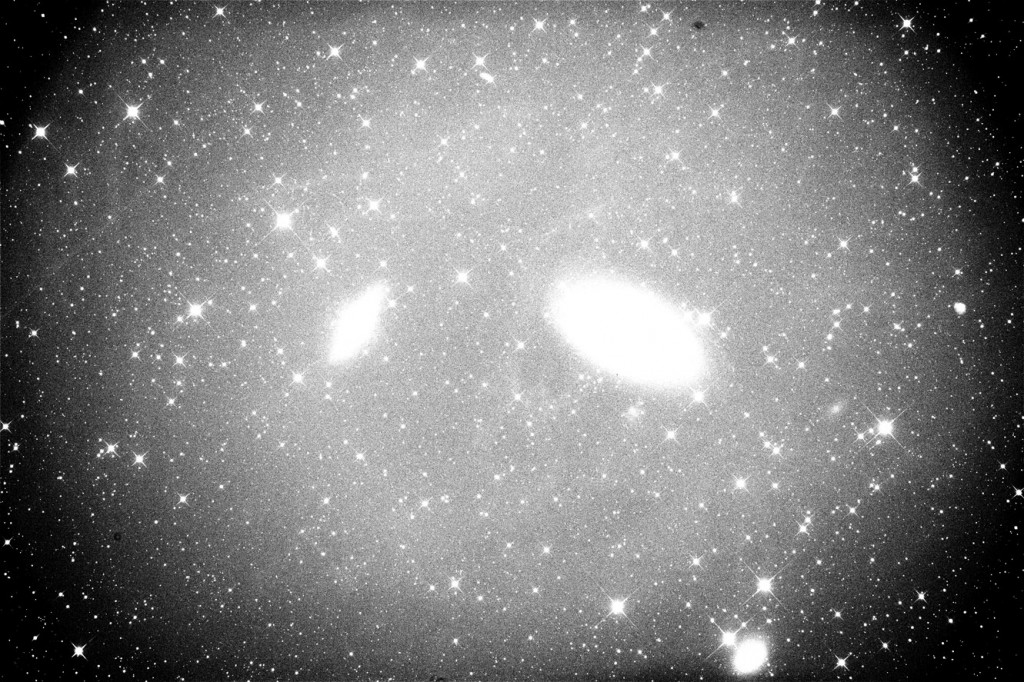
This is just a quick-look example to show how important it is to perfectly well calibrate your flat fields with either master bias (for really short flat field subs taken with interline readout Kodak chips and cameras with electronical shutter only!) or master dark or a combination of master bias and master dark when some kind of optimization (scaling) is used in the calibration process (typically when you do not have a proper length master dark for your individual flat field subs).

Calibration with just a master dark (without a flat field) is a „no-go“ for large CCD chips even with a high-end astrograph having small amount of vignetting.

Master dark frame ONLY calibration.

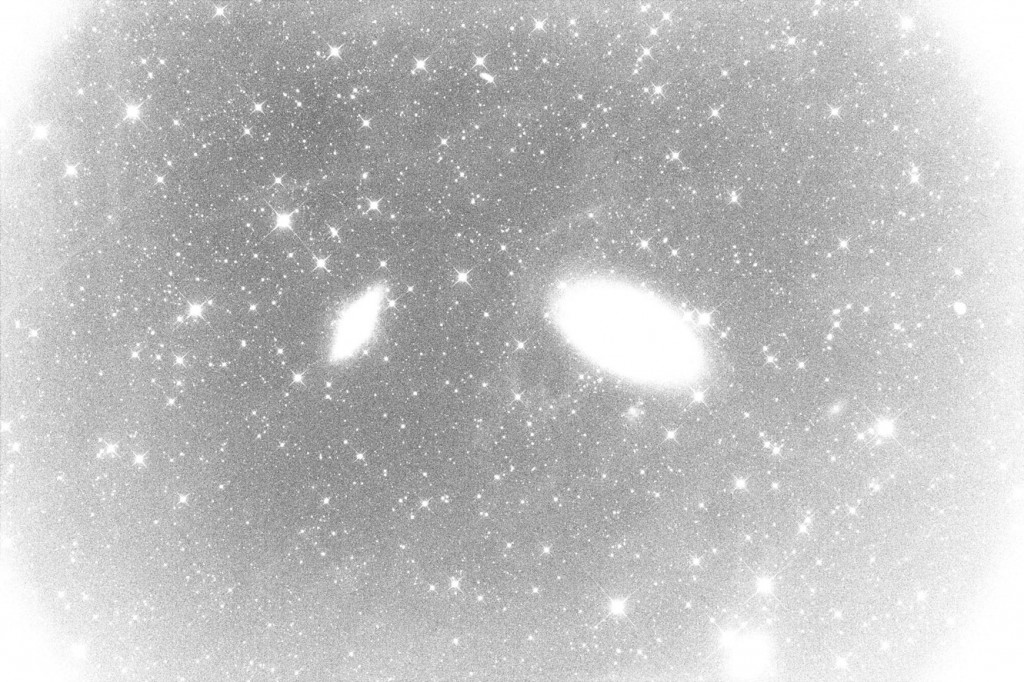
Calibration with just a master flat field (no darks at all) is also a „no-go“ due to over/under correction of vignetting for our case (Kodak, large surface chip).

Master flat field frame ONLY calibration.

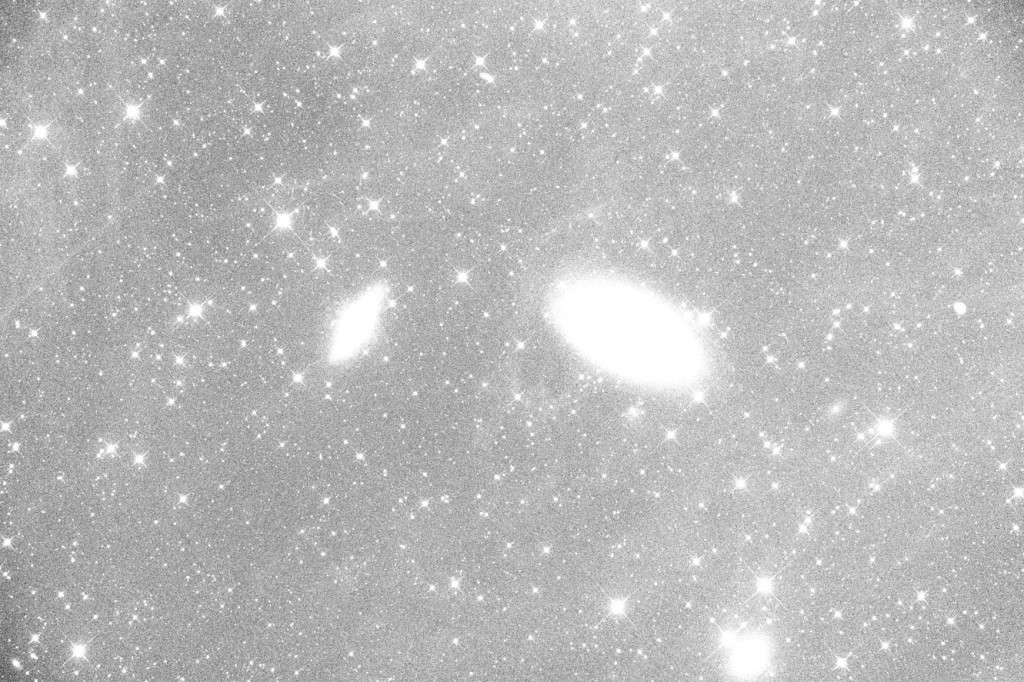
Calibration with both master flat and master dark is „almost-a-go“ in case when you do not calibrate your individual flat field subs. In such a case you may again face some minor over/under correction of vignetting.

Master dark frame AND improper (without flat-dark) flat field calibration.

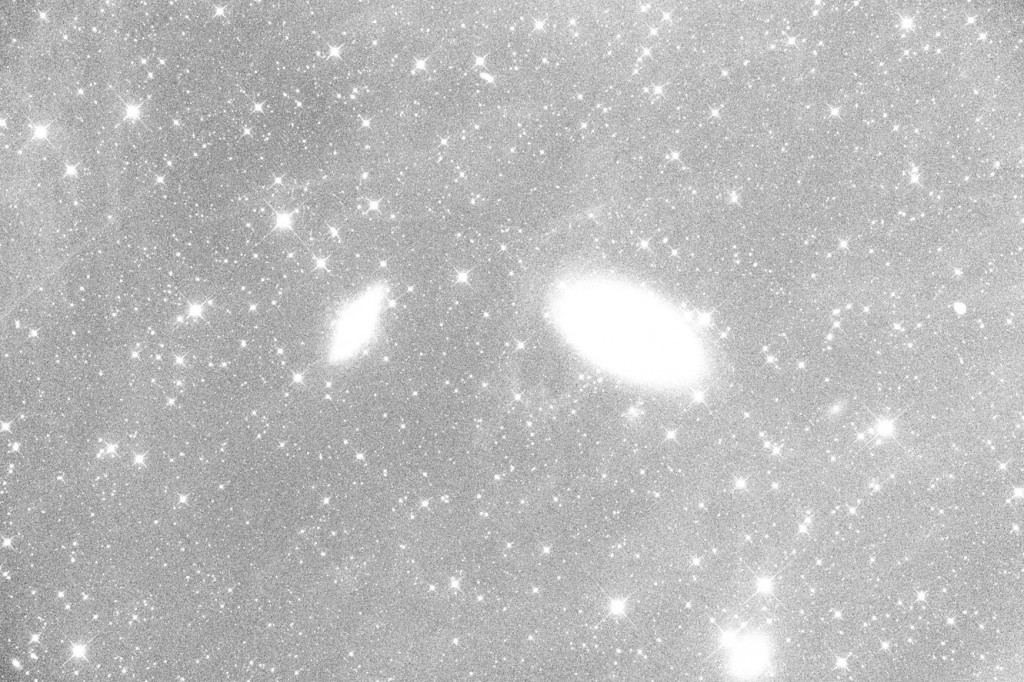
The correct approach for Kodak, large format chips, is to perfectly calibrate your individual flat field subs with proper length (and temperature) master dark frame (or a combination of master bias and master dark at the same temperature and binning as the light frame subs were taken at when scaling/optimizing techniques are used in order to create a matching master dark).

Master dark frame AND proper (with flat-dark) flat field calibration.

It is normal to see some amount of slight gradient in the images (even in narrow band, namely in the OIII channel) while part of it comes from the real, in some way „polluted“, night sky and some of it might be introduced by a not perfect master flat (which becomes a real problem with faster F-stop systems like below F/4). Flat field calibration is a tough „magic“ even for experienced astroimagers… :(

BTW again, I’d like to emphasize that this approach master dark + flat dark calibration of your individual light frame subs is essential for all Kodak chips and for OSC (Color) versions of Sony chips (to get rid of electroluminiscence and to fix bad pixels in the individual pixels of Bayer matrix). But that’s another story…

Rubriky: Articles in ENGLISH, Pokusy | Napsat komentář

Borg 77EDII Astrograph – Roddier Analysis

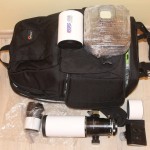
Borg as Carry-On Baggage

Borg as Carry-On Baggage

After 5+ years of imaging with Borg 77EDII reduced down to F/4.3 with the Super Reducer (part #7704) which really covers entire full-frame field (36x24mm) very nicely though with notable vignetting in the very corners I am still using this nice, compact and lightweight, feather touch equipped short focal length telescope for widefield imaging and for expeditions as it’s very easy to take it on board of an airplane (total weight is around 2.5kg).

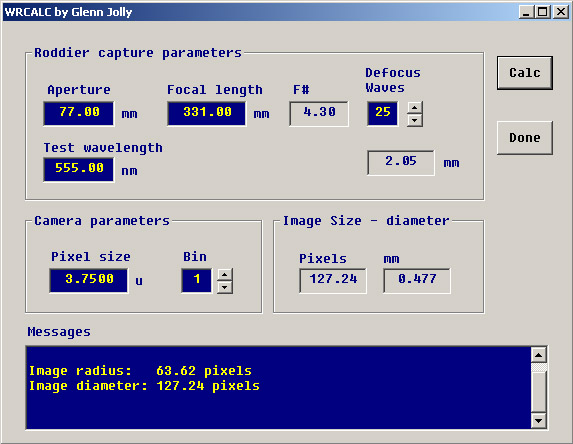
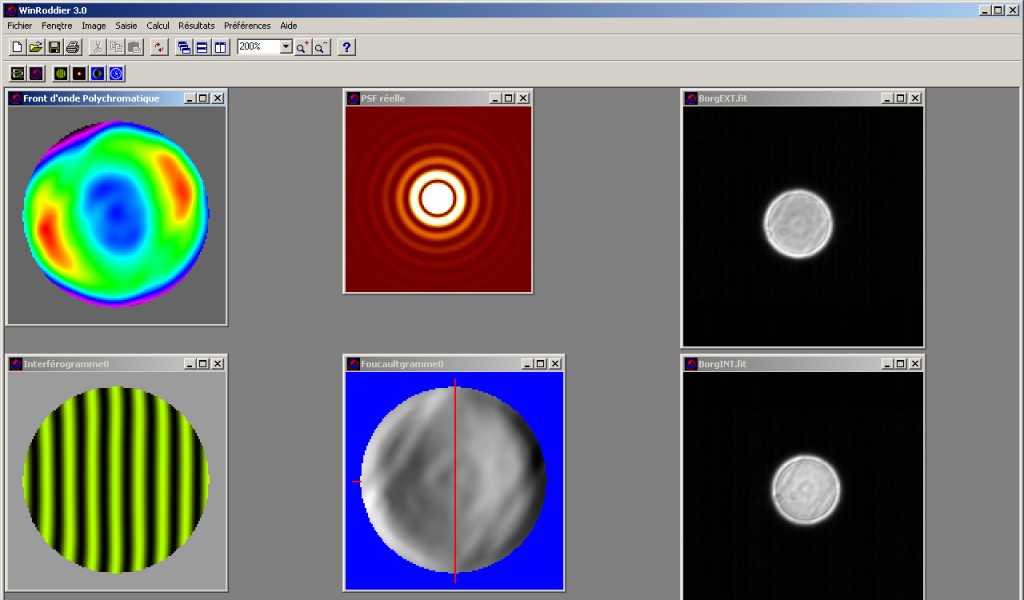
In this short test I have focused on Roddier Analysis using WinRoddier 3.0 software that is now very easy to use especially with WRCALC utility that calculates the major parameter – how many pixels should the defocused star occupy on the chip of the camera used to capture data along with focus travel in order to reach such a defocus (either inward or outward from focused bright star in the middle of the FOV) valid for tested wavelength, see:

WRCALC

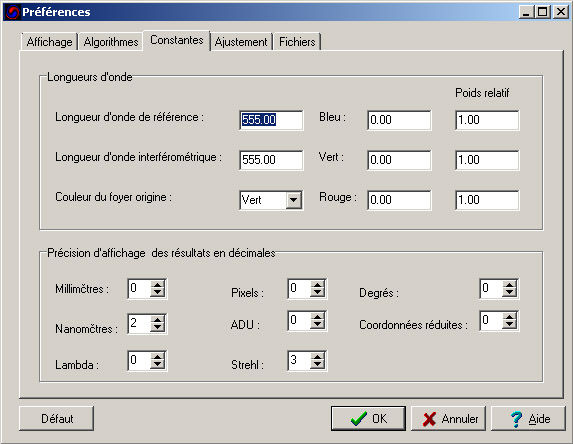
It is important to do the test for selected wavelength which is set in the preferences window of WinRoddier:

GreenIs555nm

Green is 555nm according to New WinRoddier User Manual

Don’t forget to adjust Strehl precision to 3 to see other value then 0 or 1 in the results window!

Also, for my testing, I have adjusted Preferences->Algorithmes->Nombre maximal d’iterations from 3 to 7. All other values were left unchanged (default).

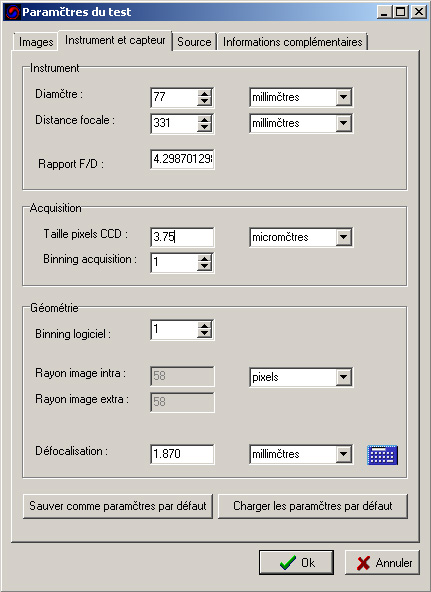
Test Setup Parameters:
Borg77EDII-Roddier-GreenFilter-TestParameters

Test Results – Charts/Images:
Borg77EDII-Roddier-GreenFilter-TestResults

Test Result in Numbers:
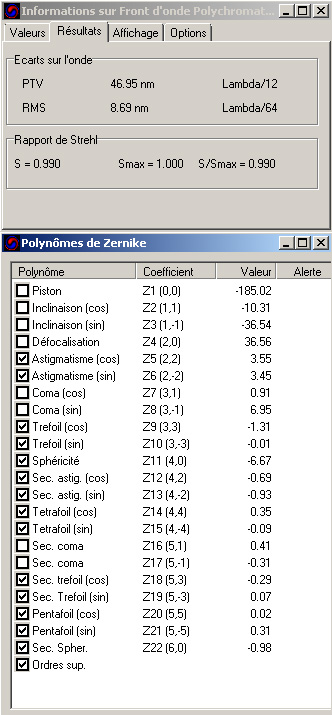
Borg77EDII-Roddier-GreenFilter-TestResultNumbers

Comment:
It looks too much perfect to me (Strehl 0.989), but it’s true that in Green color the Borg really performs very, very well (as well as in Red and all narrowband, obviously) so next time I should test the Blue color too as Blue (and Luminance) is the „worst“ – has biggest FWHM of stars even in perfectly focused images.

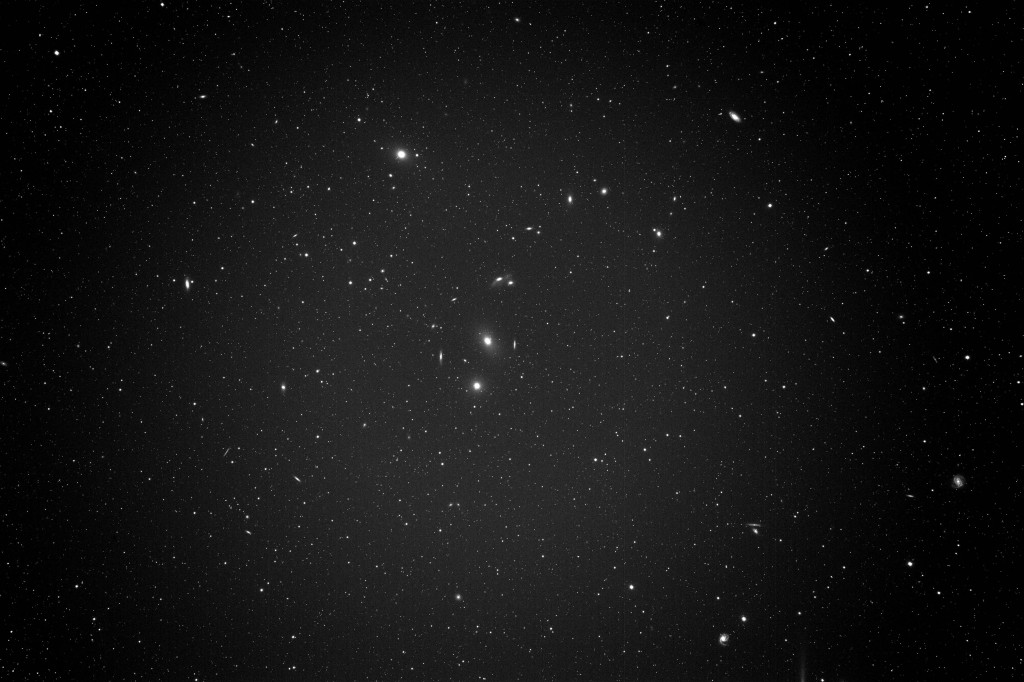
To support my words on performance in Green, here’s a sample image (raw, unprocessed, Light frame) took on 1st of February 2014 on Tenerife at 2300m above sea level. The only drawback is that the JPG quality was set to 50% due to file size limits (1MB) on my blog.

References
Borg 77EDII Astrograph – an user “review”
Projet WinRoddier

Rubriky: Articles in ENGLISH, Technika, recenze | Napsat komentář

Deconvolution Example

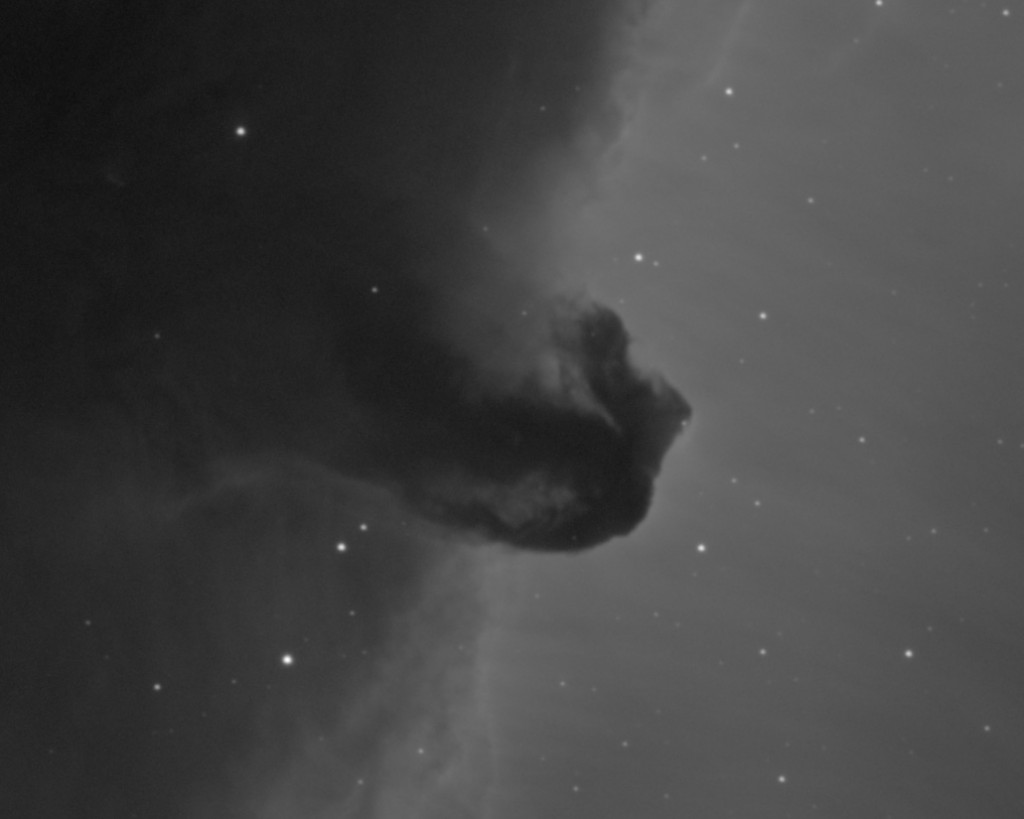
Finally, after years of imaging with short focal length telescopes which resulted in so called undersampled data (image scale of 3″, 4″ or 5 arcseconds and more) I have collected some oversampled data now with my newest setup (image scale of 1″ – camera pixels 4.54um on 900mm of focal length). Therefore I can start looking into deconvolution process and investigate the options we have. Since I am a „dumb head“ I need something simple like click here and there and save the result.

Here’s an example of such a quick process using a demo of CCDStack: Process->Deconvolve with Positive Constraint method.

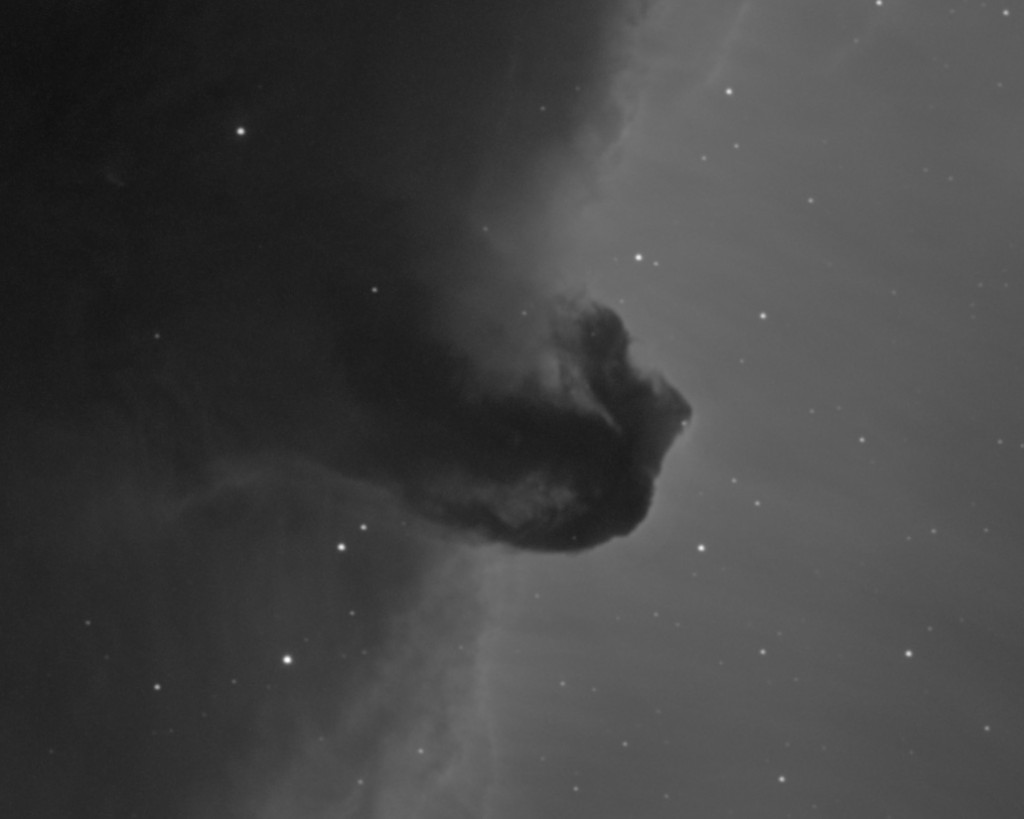
Original image:

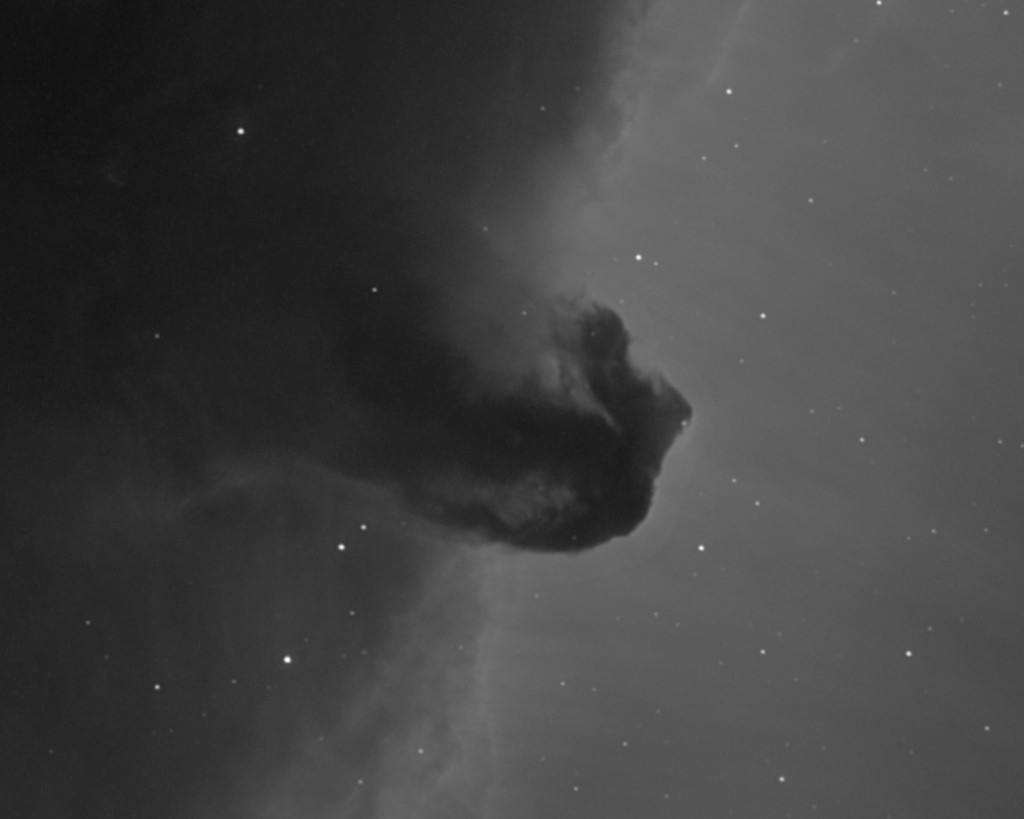
Positive Constraint with 20 iterations:

Positive Constraint with 50 iterations:

You can see that the 50 iterations created too many artefacts around the Horse Head therefore I have used the 20 iterations approach for final image processing:

Rubriky: Articles in ENGLISH, Pokusy | Napsat komentář

Hawaii, Mauna Kea, Mauna Loa

Hawaii, Mauna Kea

UKIRT, CSO, JCMT, Submillimeter Array, Subaru, Keck Twins, NASA IRTF, CFHT, Gemini North

When Hawaii was set as our honeymoon trip destination, it was clear that one of the islands we visit will be the Big Island with famous Mauna Kea a dream place for all astronomers.

I believe that the images are self explanatory. The Saddle Road is, nowadays, in superb, perfect condition. You definitively do not need a 4-wheel drive to go to the top (Summit) of Mauna Kea, unless there is snow. The only problem might be with US cars having automatic transmittion as not all of them allow for low-gear mode in order to make a safe descent. For climbing with a 2-wheel car you might want to disable traction control. Anyway, I decided to make THEM a favor and rented a Jeep (I enjoyed off-road driving on other parts of the island anyway).

The only real attraction, apart from the fact that you are at very high elevation and surrounded by many observatories, was a well in advance scheduled visit of Subaru Telescope. The excursion took about an hour and was definitively worth it. From the rest of observatories, there’s only few things to see at the Keck twins and nothing else.

I had a plan to make some astroimaging there, but it was really cold up there and, I would have to let my wife alone and ask her for driving down in the evening and back again in the morning to pick me up at some place hidden from everyone where I would shoot the stars with my ultra mobile astro setup (startrails, timelapse movie), but it simply was not doable on a honeymoon trip. Therefore, my plan B, was to go to Mauna Loa instead (about 3100m elevation) and wait until evening to see if there would be a clear sky during night. It turned out that there’s always cloudy near the Weather station so I decided to go back to Mauna Kea (near VIS) and climb a nearby peak by foot myself. There was still half cloudy that night. The biggest disappointment was seeing the billion of cars descending Mauna Kea in the evening. Ugliest face of MASSIVE tourism.

I made couple of shots with my DSLR that I am lazy to process :-) so I won’t probably ever publish them.

Here, you can find couple of daylight images from the trip:
http://www.astro.cz/galerie/v/uzivatele/Konihlav/Havaj-MaunaKeaLoaKea-2013/

In the end – at least – it was a nice experience – just being there!

Rubriky: Articles in ENGLISH, Expedice (vícedenní) | Napsat komentář

Expedition Chile 2010

Expedition Chile 2010
Took place in October 2010 when me (Pavel Pech) and my friend Pavel Vabrousek decided to go south in order to do some astroimaging as the weather conditions in central Europe are truly unfortunate for our hobby. As I said, the reason going south (for me) was not to see the stars I cannot see from the northern hemisphere but, rather, the reason was to see some clear sky and enjoy my hobby in the desert of Atacama – I love astroimaging, I love desert places.

Here, you can find couple of daylight images from the trip:
http://www.astro.cz/galerie/v/uzivatele/Konihlav/expedice-Chile-2010/

and here, you can find the astroimages that I took during the 2+ weeks trip (10 nights of imaging resulted into 24 images, the same amount that I manage to take per year in the damn European weather):
Pavel Pech, Chile, 2010

:)

Rubriky: Articles in ENGLISH, Expedice (vícedenní) | Napsat komentář

Newtonian Secondary Holder (Spider Vanes) Issue

Newtonian astrograph is probably the best choice for those of us who are seeking ultimate performance. But, there are plenty of really key (fundamental) things that must be built with highest precission and quality possible. One of them is the secondary holder. Along with the need for ultimate focuser I have myself decided to go with Astrosysteme Austria (ASA) and in spite of couple of problems I have found, I do not regret this choice (because I am the left handed guy who has both hands left ones and am not willing to spend years on home making while I know that I would use ASA focuser and ASA reducer/correctors anyway).

Because a major problem for the mirror-based telescope is that it holds the collimation (you have to be able to collimate and the telescope has to keep the collimation over time as much as it gets while the secondary holder is the key thing in this regard) you need it to be robust and solid. OK, so what are the secondary holder options? A thick one (4mm) works well in this regard, but it produces very ugly square like stars – this effect is more apparent on smaller apertures below 12″ (from 300mm upwards a 3-4mm thick single spider would be fine and would not produce square shaped stars). Another option is so called double spider that has 8 vanes in total. ASA uses (since recently) this double spider option made out of carbon for increased stiffness. The other parameters like the distance of the double spider vanes and the ratio between aperture size and vanes thickness are responsible for the shape, length and appearance (diffraction specturm) of the diffraction spikes. This topic would cover a dedicated article, but as it can be googled out I won’t spend my time on it. One single comment would be that when you use a narrow band filter that filters all wavelengths except of selected narrow one you get a dash line diffraction pattern.

Back to the issue I have. The double spider, as everything, has good points and bad points. The bad is that it requires the spider vanes to be both perfectly parallel to each other and also in-line on both sides from the central part (that holds the secondary mirror). Even though my ASA telescope had precisely drilled holes for the spider, the carbon-made vanes were not aligned to be in-line from one end to the other end of the OTA (I can imagine that tightening screws could be on blame too, but you know, you need to tighten, but no overtighten).

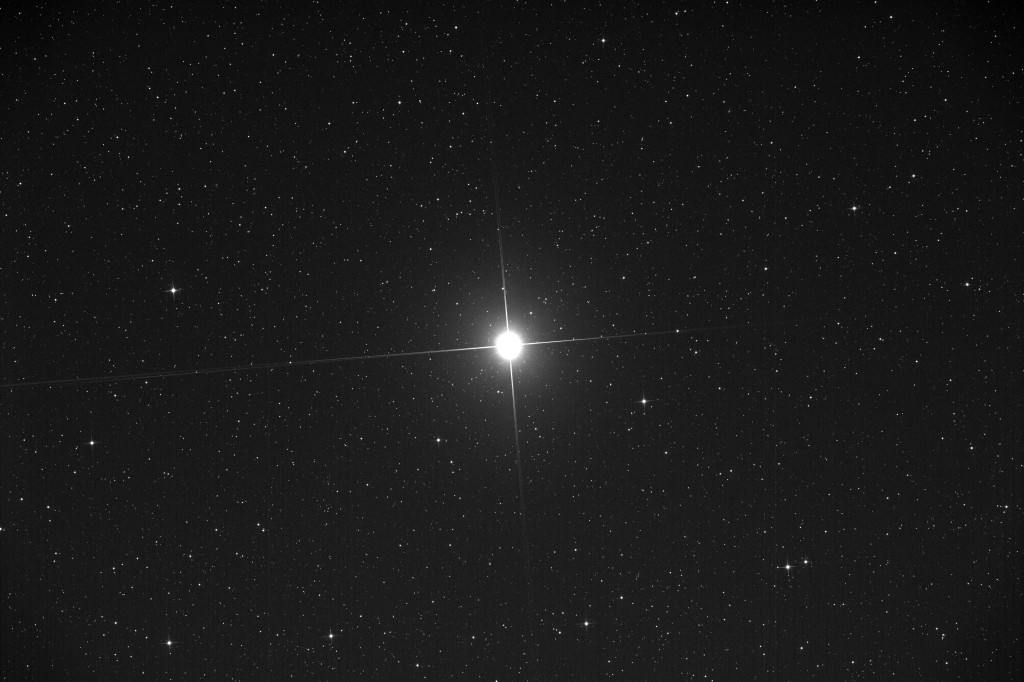
To give some evidence on this fact, let’s first see how a collimated telescope (with PERFECT BACKFOCUS) image looks like (here I managed – luckily, somehow – collimate my telescope perfectly, but I was having the splitting diffraction issue – nowadays the issue is fixed, but I have not managed to collimate so well since then).

Perfectly Collimated Newtonian Telescope

Full Scale Light Frame (Luminance)

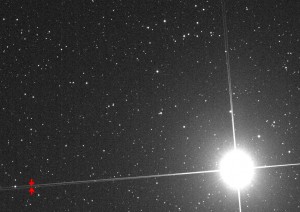
Then have a look at the diffraction spikes that apparently split more and more as they are farther from the brighter star. For those unable to see this effect I have marked it in detail with red arrows.

Bad Diffraction (Splitted) Pattern

Therefore, when you have everything perfect, but get this splitted pattern and you own a double-spider then you should check the in-line-ness :-) or parallel-ness of the spider vanes.

Fortunately, when I contacted ASA (Dietmar) they were „responsive“ and I scheduled a one day trip (visit) to ASA premises where their engineer fixed my problem. Well, now 7 out of 8 total vanes are perfect. Since I truly understand how this is complicated to do, I am happy now. Anyway, every system has its „properties“ (I mean little imperfections).

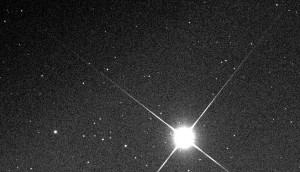
Let’s see current state after the spider vanes were aligned to be in-line with the oposite vanes.

Correct Diffraction Pattern

Another issue resolved :)

Lesson learned? That double spider holders are hard to deal with. A friend of mine had the one from teleskop-express but it broke when he fast tightened the holding screws… another has the same issue like I had (but those people who downsize to 25% are OK with everything – not my case when every pixel counts). If you are about to get an ASA scope (which I recommend) then do ask for this to be perfectly checked. We have to put high demands on telescope manufacturers in order to improve things…

Rubriky: Articles in ENGLISH, Pokusy, Technika, recenze | Napsat komentář

ASA 10″ Newtonian F/3.6 (0.95x Wynne) – First Light

At the end of year 2012 I have sold my Losmandy G-11 mount because I knew that one day I will have to adopt a Newtonian system as my primary astrograph (and I did not want to overweight the perfectly working G-11 and I did not want to keep two „big“ mounts as I am using only one at a time). Therefore I changed my primary mount for a Gemini G53F with Pulsar2 controller (with built-in GPS system) that can handle lot of weight with ease (and precision). But what next? After selling all telescopes that I have used rarely (weather permitting problem) I decided for a top solution with quality in mind.

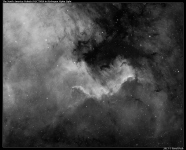
January 2013 ordered, March 2013 delivered, May 2013 first light tested. Vignetting issue resolved, spider vanes (secondary holder) issue resolved during summer 2013. Last issue remaining (subtle primary mirror related thing) is currently „under investigation“. In this short article I would like to show the H-alpha first light. In April 2013 I made the same image using my small Borg77EDII with a superb Atik460EXM ccd camera doing 24x6min (144min total) so in May 2013 I decided to shoot the same thing doing the same, 24x6min subs with the new astrograph. In spite of the fact that KAI-11000 CCD is 10 times worse than ICX694 for narrow band imaging (5x worse in noise terms, 2x worse QE of the CCD in Ha), the big aperture of 250mm vs. 77mm and the big surface of the detector (36x24mm vs. 12.5x10mm) brought its fruit.

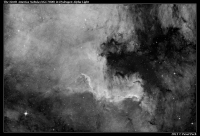
The North America Nebula (NGC7000)

ASA 10″ NWT + MII G3-11000


Borg 77EDII + Atik 460EXM

On the other hand, you can see the confirmation of „known“ fact that you can do a miracle-like images even with a small refractor, but you need it to be a fast one and you definitively need a superb (ultra clean) CCD camera. But for LRGB imaging the Newtonian system does not have any competition (that’s why I keep two imaging systems and two main CCD cameras).

All my published images taken with my new ASA 10″ can be found on following
URL link.

Rubriky: Articles in ENGLISH, Technika, recenze | Napsat komentář

miniBorg 71FL F/3.9 (0.7x #7870) and 36x24mm CCD

I have been recently asked on a comment on performance of 71FL vs. 77EDII (because I am known for owning all Borg lenses and reducers). I have found this quick-test image somewhere on my hard-drive. It’s from November 2011 so kind of an old test. My conclusion is that again, biggest problem is helical focuser, second big problem was the bad design of the 0.7x reducer that was held in place by only 1 screw located on a side of the inner barrel which could (and also did) cause some misalignment that completely degrade the final performance, especially on a large (full frame 36x24mm) chip.

Since I did not want to spend more money on purchasing FTF and producing custom parts in order to place the reducer inside of the focuser in a smart way I have recently sold all my Borg scopes and reducers except of 77EDII F/4 SR combo (in the end I have converted to an expensive Newtonian system from ASA that brought my imaging to yet another level).

Here you can find one of the best results I got from this combo with a 34x24mm FF CCD (MII G3-11000 camera).

miniBorg 71FL + 0.7x #7870 reducer (F/3.9) + MII G3-11000 CCD

and the corresponding (uncalibrated – except for hot pixel removal and vertical column banding supression) light frame:

miniBorg 71FL + 0.7x #7870 reducer (F/3.9) + MII G3-11000 CCD

For star-field testing I am always using a H-alpha filter that shows the true shape of the stars (along with making them smaller). Using broadband filters makes the star shape differences much less apparent, but obviously works well for APO-chromaticity testing.

:) :(

BTW all refractor manufacturers make the same design mistakes over and over again (I should start my own company that would deliver 100% perfect astrographs without a single compromise). Because I learned that I have to tune the refractors myself using plenty of custom parts, I have started using Newtonian systems in spite of the well known and much afraid of task called collimation. The BIG aperture and performance makes a HUGE difference in terms of light collecting. Plenty of refractors are slow (F/5 and even worse) and I simply do not have enough clear skies to make one picture in three clear nights.

Rubriky: Articles in ENGLISH, Technika, recenze | 4 komentáře